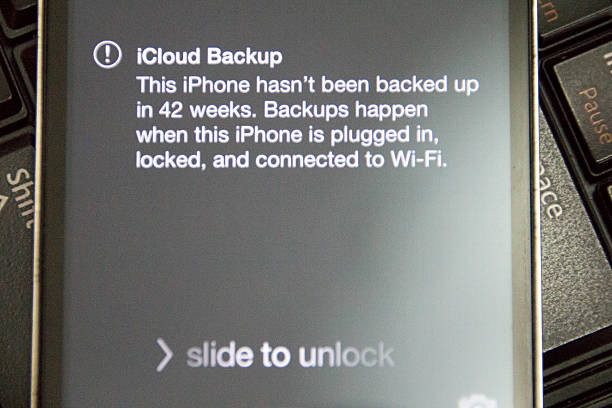
It is crucial to back up your iPhone regularly to safeguard all its data, such as photos, contacts, messages, and apps. This ensures you can easily retrieve everything if anything happens to the device. However, several variables affect how long it takes for an iPhone backup process. In this article, we will explore details surrounding backing up time frames when using iTunes or iCloud programs and ways in which users can expedite the procedure’s duration.
Factors Affecting Backup Time
In order to accurately determine the time it will take to back up an iPhone, it is essential to consider various factors that impact this process. Some of these factors are:
- Amount of Data: The larger your iPhone’s data volume, the greater the backup duration will be. This encompasses images, videos, applications and other documents.
- Internet Speed: The speed of your internet connection greatly affects the duration it takes to backup your iPhone on iCloud. Faster speeds imply faster backups.
- Device Condition: If an iPhone is older or has performance issues, its back up speed will be slower as compared to one with optimal performance.
- iCloud Storage: If your iCloud storage is close to maximum capacity, it can affect the speed of the backup process.
How Long Does Backing Up iPhone Take with iCloud?
iCloud provides the convenience of wireless and automatic iPhone backup. However, how long does backing up an iPhone take with iCloud?
Initial Backup
The initial iCloud backup may require a few hours, especially for bulky data sets. Typically, it can range from 1 to 4 hours depending on various factors like the amount of data you have stored, Wi-Fi speed and your iPhone’s condition.
Subsequent Backups
The speed of successive backups is typically faster as they only need to store newly added or modified data. The duration for such backups ranges between a couple minutes and an hour, making incremental backup efficiency a significant benefit for frequent iCloud users.
Factors Influencing Backup Time
The amount of time it takes to back up your iPhone with iCloud may depend on various factors:
- Data Volume: The backup duration increases in proportion to the amount of data you possess, such as photos, videos, app data and system files.
- Wi-Fi Speed: A speedy Wi-Fi connection can effectively decrease backup duration. It is important to connect with a dependable and rapid network for optimal performance.
- iPhone Performance: The speed of your iPhone backup can be influenced by both the age and performance of your device, with newer models generally completing backups more efficiently.
Table: Real Data and Statistics
Your iCloud backup speed primarily relies on your Wi-Fi connectivity and data volume, as stated by Apple. Users have provided a rough estimate which is mentioned below:
| Data Size | Backup Time (Approx.) |
| 1 GB | 15-30 minutes |
| 5 GB | 1-2 hours |
| 10 GB | 2-3 hours |
| 20 GB | 4-5 hours |
How Long Does Backing Up iPhone Take with iTunes?
iTunes backup for your iPhone is generally quicker as it utilizes a wired link compared to iCloud. Nonetheless, the precise duration may differ. Knowing the intricacies of this method can enhance your backing up practices and safeguard that you store data safely.
Initial Backup
The duration of the initial iTunes backup relies heavily on the type and amount of data present in your iPhone, such as app data, photos, videos, and system files. Consequently, it can take anywhere from 30 minutes to 2 hours for completion.
Subsequent Backups
iTunes performs quicker subsequent backups by solely backing up new or altered data, taking approximately 10 to 30 minutes. This speed advantage of incremental backup is a valuable feature for consistent backups using iTunes.
Factors Influencing Backup Time
The duration it takes to back up your iPhone with iTunes is influenced by numerous variables.
- Data Volume: The backup time for your iPhone is affected by the data volume it contains. The more data you have, the longer it will take to back up.
- Connection Speed: The velocity of the iPhone-computer wired connectivity holds immense significance, where USB 3.0 leads ahead in speed as compared to USB 2.0 connections.
- Computer Performance: The backup speed is influenced by the computer’s performance. A computer with greater resources and faster processing capabilities will execute data backup at a higher pace.
- iPhone Performance: The speed of backing up your iPhone can be influenced by both its age and performance. Generally, newer models exhibit more efficient backup speeds than older ones.
Table: Real Data and Statistics
Here’s a table showing the average backup times with iTunes based on user reports:
| Data Size | Backup Time (Approx.) |
| 1 GB | 10-20 minutes |
| 5 GB | 30-60 minutes |
| 10 GB | 1-2 hours |
| 20 GB | 2-3 hours |
Tips to Speed Up the Backup Process

If you’re wondering about the duration of iPhone backup and seeking ways to hasten it, then these tips may be useful:
Clear Unnecessary Data
One of the most efficient methods to expedite the backup procedure is minimizing data volume. Removing redundant information can considerably reduce backup durations.
- Delete Old Messages: Get rid of unnecessary text conversations and iMessages from your device.
- Remove Unused Apps: Eliminate apps that are no longer useful to you. This not only shrinks the backup capacity but also clears up storage space on your iPhone.
- Organize Photos and Videos: Eliminate any copies or undesired ones. Think about moving them onto an external storage unit or cloud-based service for enduring safekeeping.
Use a Fast Wi-Fi Connection
Efficient iCloud backups require a strong and fast Wi-Fi connection since the speed of your internet directly impacts how much time it will take to back up your iPhone.
- Check Wi-Fi Speed: To verify your Wi-Fi speed is up to par with iCloud backup recommendations, utilize digital tools for testing such connectivity.
- Position Your Router: To guarantee a robust signal all over your house, locate your Wi-Fi router at the center position.
- Reduce Network Traffic: To minimize network traffic during the backup process, refrain from performing bandwidth-intensive tasks like downloading large files or streaming vid
Keep Software Updated
Making sure your iPhone’s software is updated guarantees that you possess the most recent advances and solutions to issues, thereby boosting backup efficiency.
- Update iOS: Make it a habit to regularly search for and download any available updates. These enhancements can boost backup speed by improving performance.
- Update iTunes: Make sure to have the most recent version of iTunes installed on your computer before utilizing it for backups.
Backup Regularly
Frequent backups mean there is less new data to back up each time, which can significantly reduce the duration of the backup process.
- Set a Schedule: Establish a regular backup schedule to ensure that backups are performed consistently and efficiently.
- Enable Automatic Backups: For iCloud users, enable automatic backups to ensure your data is regularly saved without manual intervention.
Optimize Storage
Using the “Optimize iPhone Storage” feature helps manage the storage of photos and videos, which are often the largest files on your device.
- Enable Optimization: Go to Settings > Photos and enable “Optimize iPhone Storage.” This feature keeps smaller, space-saving versions of photos and videos on your device while storing the full-resolution originals in iCloud.
- Manage App Data: Review and manage app data to ensure that only essential data is included in your backups.
Verifying Backup Integrity
It’s not just about how long does backing up an iPhone take, but also ensuring that the backup is complete and usable. Here’s how you can verify the integrity of your backup:
For iCloud Backup
To verify the integrity of your iCloud backup, you need to access the iCloud settings on your iPhone. This process ensures that the most recent backup is complete and free of errors. Regularly checking your iCloud backup helps confirm that your data is being saved correctly and is available when needed.
- Go to Settings on your iPhone.
- Tap on your name at the top to access your Apple ID settings.
- Select iCloud from the menu to view your iCloud settings.
- Tap on iCloud Backup to see the backup options.
- Check the date and time of your last backup to ensure it is recent and completed successfully. This date should match the last time you connected your iPhone to Wi-Fi and plugged it into a power source.
- Make sure that the backup process is enabled by verifying that the iCloud Backup switch is turned on. If it is not enabled, turn it on and initiate a manual backup to ensure everything is correctly set up.
For iTunes Backup
Verifying your iTunes backup involves using the iTunes application on your computer. This process helps you confirm that your backups are up-to-date and available for restoration. Regular verification of iTunes backups ensures that your local copies are accurate and usable, especially if you prefer wired backups.
- Open iTunes on your computer. Ensure that you are using the latest version of iTunes to avoid compatibility issues.
- Go to Preferences. On a Mac, this is found under the iTunes menu; on a Windows PC, it’s under the Edit menu.
- Click on the Devices tab in the Preferences window to view all the backups stored on your computer.
- Check the list of backups to see the dates and ensure they are recent and complete. The dates next to each backup indicate when the backup was created.
- Look for any unusual symbols or messages next to the backup names, as these can indicate errors or incomplete backups. A successful backup should have a clear and straightforward entry with the correct date.
- If you notice any issues or missing backups, try performing a new backup and ensure that it completes without errors.
Restoring from Backup on a New Server

If you need to restore your iPhone from a backup, the process can also vary in time. Here’s a breakdown:
Restoring from iCloud
Restoring from an iCloud backup is convenient because it allows you to restore your data wirelessly. However, the process can take varying amounts of time depending on several factors.
- Connect to a reliable Wi-Fi network.
- Turn on your new iPhone and follow the setup prompts.
- Sign in to iCloud with your Apple ID and password.
- After signing in to iCloud, you will see a list of available backups.
- Select the backup you want to restore from. Ensure it is the most recent and complete backup.
- The restoration process will begin. This can take anywhere from 30 minutes to several hours depending on the size of the backup and the speed of your Wi-Fi connection. During this time, your iPhone will download all the data from iCloud and restore it to your device.
Restoring from iTunes
Restoring from an iTunes backup generally takes less time compared to iCloud because it uses a wired connection. This method is ideal if you have a large amount of data or if you prefer using a computer.
- Use a USB cable to connect your iPhone to your computer.
- Open iTunes on your computer. Ensure you have the latest version of iTunes installed.
- In iTunes, select your device from the top left corner.
- Click on “Restore Backup”. A list of available backups will be displayed.
- Choose the appropriate backup and click “Restore”.
- The restore process will begin. This usually takes between 20 minutes to 2 hours depending on the size of the backup. During this time, iTunes will transfer all the data from the backup to your iPhone.
Conclusion
Understanding how long backing up an iPhone takes helps you plan and ensure your data is safe. By knowing the factors that affect backup time and how to optimize the process, you can make backing up your iPhone a seamless experience. Whether you use iCloud or iTunes, regular backups are crucial for data security and peace of mind.
FAQ
The time it takes to back up an iPhone depends on the amount of data, your internet speed, and whether you are using iCloud or iTunes. It can range from a few minutes to several hours.
Large amounts of data, slow internet connections, or nearly full iCloud storage can cause backups to take longer.
Yes, you can use your iPhone while it is backing up, but it might slow down the process.
It’s recommended to back up your iPhone regularly, especially before major updates or if you’re planning to switch to a new device.
If your backup fails, check your internet connection, free up some storage space, and ensure your device is updated. Try restarting your iPhone and attempt the backup again.


